
Root & Install TWRP on Lenovo K8 Plus XT1902-2 [Tutorial]
Unlock Bootloader & Root Lenovo K8 Plus XT1902-2: If you are a proud owner of Lenovo K8 Plus XT1902-2 and are looking to root your device then you have reached the right spot. In due course of this post, we will guide you with the rooting process for Lenovo K8 Plus XT1902-2. Coming with a 5.20 inches touch screen display with a resolution of 1080 by 1920 pixels; Lenovo K8 Plus is truly a masterpiece. A 2.5 GHz octa-core process coupled with 3 GB of RAM provides this device a fantastic amount of processing power and speed.

The device doesn’t let the shutterbug inside you go down as it features a 13 megapixel primary camera on the back along with a 8 megapixel camera in the front so that you don’t miss a perfect moment ever. The smartphone was launched with Android 7.1.1 operating system with 32 GB of internal storage which can be expanded up to 128 GB with the help of a Micro SD Card.
The 4000 mAh battery gives you enough power to last throughout the day. The best thing about this fantastic device is that it packs all this power in a weight of just 165 grams. Lenovo K8 Plus even has USB OTG support, which is awesome. Last, but not the least, the device has two Nano SIM slots (GSM + GSM), so, you can enjoy the fantastic amount of virtual strength Lenovo K8 Plus holds without falling into the hassle of carrying a second smartphone for your second number. Now, before we start the rooting process, it is mandatory that you know about the following obligatory requirements:
Contents
Root & Install TWRP on Lenovo K8 Plus | Requirements
- Download & Install ADB & Fastboot Tools
- Unlock Bootloader of your Device
- Download TWRP
- Download Flashable Super SU File
Unlock Bootloader and Flash TWRP on Lenovo K8 Plus [STEPS]
- For installing ADB & Fastboot on your Windows PC/Laptop please launch the setup file which you have downloaded from above. You will be greeted by simple on-screen installation instructions. Within few minutes ADB & Fastboot will get installed on your system.
- Now, you need to have USB Debugging enabled on your device so that ADB & Fastboot can detect your device. Please do the same by navigating to Settings -> About Phone -> Build Number -> Tap it 7 Times for activating Developer Options. Navigate back to Settings -> Developer Options -> Toggle on ‘USB Debugging.’
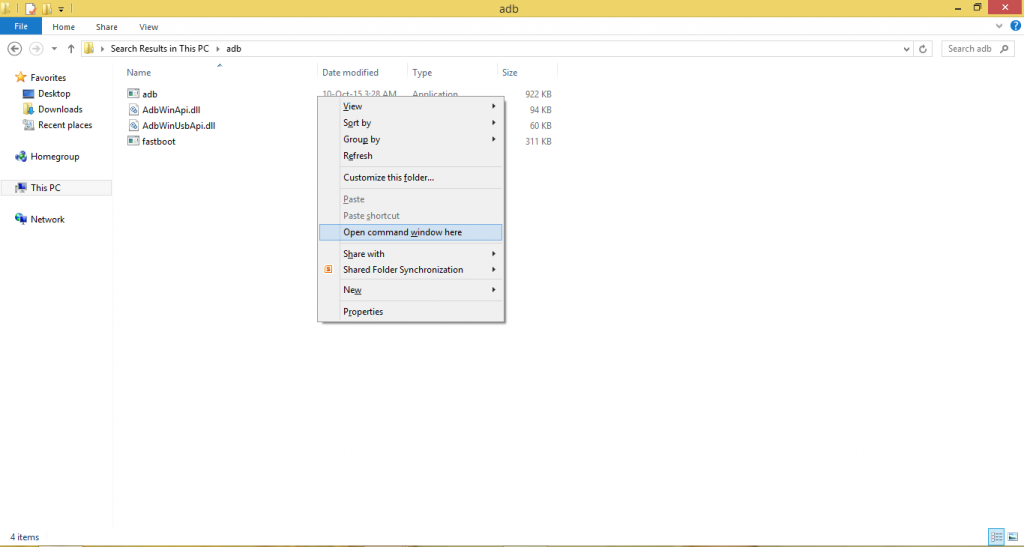
- For unlocking the bootloader of your Lenovo device please connect it to your Windows PC/Laptop. Navigate to the folder where you have ADB & Fastboot installed. Right click anywhere and from the pop-up menu choose the option of Open Command Window Here.
- In the command prompt that comes up type the following command to ensure that your device is detected:
adb devices
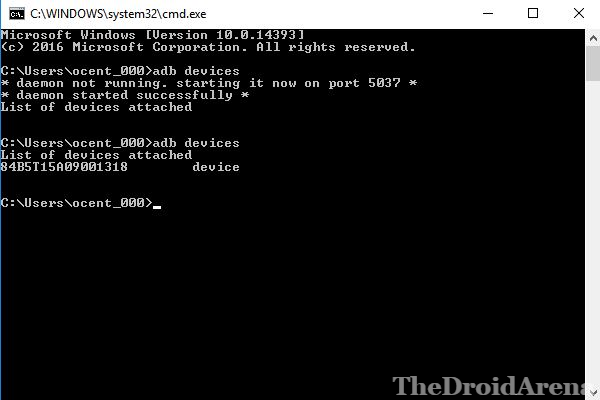
- Once your device is being detected, please make your device enter into ‘Fastboot’ mode. Switch off your device and press Power & Volume Down button simultaneously for about 10 seconds. Release and your device will boot up into fastboot mode. Great! Key in the following command: fastboot devices
- Now, for unlocking bootloader enter the command:
fastboot oem unlock
- Please make sure that you have got TWRP Custom Recovery installed on your device. Without it this tutorial won’t work.
- Also, you need to perform a Dalvik Cache Wipe in recovery mode before/ after flashing Super SU package.
- Last, but not the least, please ensure that your smartphone has a charging level of at least 80-85%. If not, then please do charge it before starting with the rooting process.
Root Lenovo K8 Plus XT1902-2 using Super SU [Steps]
- Coming to the rooting process, please keep your device connected to your Windows PC/ Laptop and transfer the Super SU file to the internal memory of your device.
- Once done, please reboot your Lenovo smartphone into recovery mode. For that switch off your device and press Volume Up + Power Button simultaneously.
- Now, the TWRP screen will be visible in front of you. Clear Dalvik Cache.
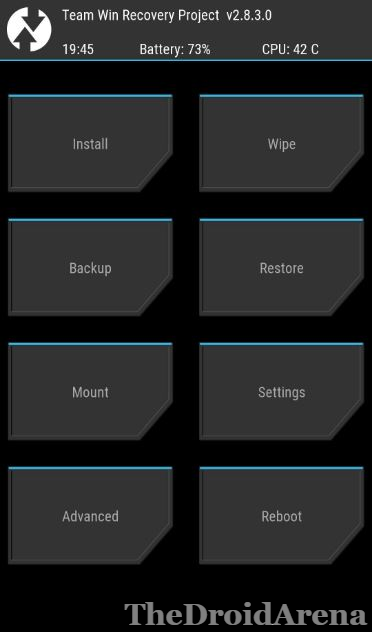
- You will see an option of ‘Install.’ Tap on it and locate the Super SU file which you have transferred to the internal memory of your device in the first step.
- Select the file and swipe to provide the necessary confirmation for installation. Clear Dalvik Cache once again after successful installation.

- Great! You have successfully rooted your Lenovo K8 Plus device now. For checking whether your device is rooted or not you can download the ‘Root Checker‘ application which is readily available in Google Play Store.
This was the process to root and install TWRP on Lenovo K8 Plus XT1902-2. Please note that you need to have prior knowledge of what you are doing before taking on the above-mentioned steps. In any case you happen to brick your device and get into any kind of hardware or software trouble we are not responsible. If you have any questions to ask please feel free to ask by shooting them down in comments below.
You may like to read the following posts:
- How to Root OnePlus 6 and Install TWRP Recovery.
- How To Unlock Bootloader and Root Xiaomi MI Mix 2S.
One thought on “Root & Install TWRP on Lenovo K8 Plus XT1902-2 [Tutorial]”