
[How-To] Root & Install Custom Recovery on HTC U12+
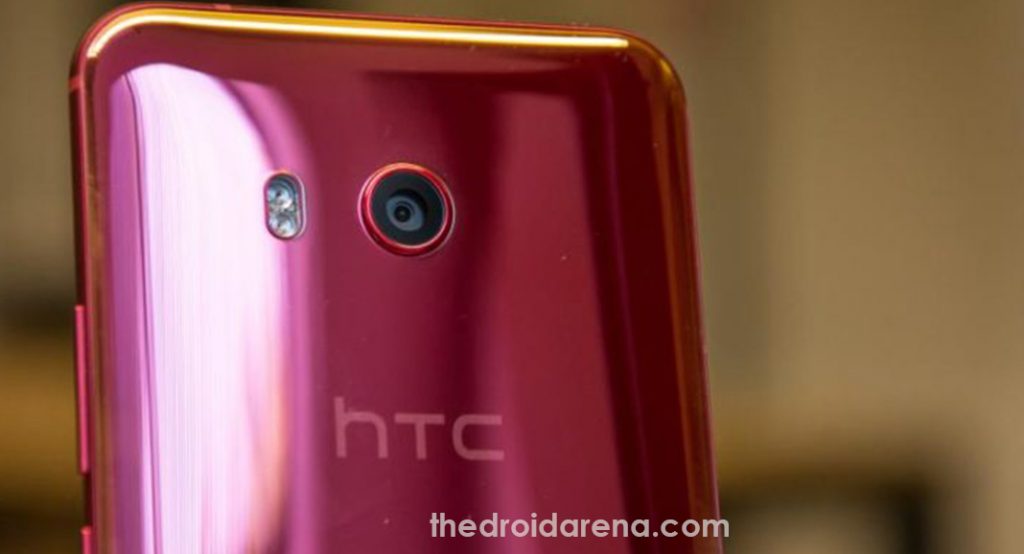
Unlock Bootloader & Root HTC U12 Mobile Phone: The U12+ is an, absolutely, fantastic smart phone launched by HTC. It boasts of a 5.7 inch QHD + Super AMOLED Display and possesses dual 12 MP + 12 MP rear camera plus a 16 MP secondary camera. The device performance is, undoubtedly, great and unexceptional. This is certain as it is powered by 2.45 GHz octa-core Snapdragon 845 processor and 6 GB of RAM. But, we are not here to talk about the performance of this amazing smart phone. In this guide, we will tell you the steps to unlock bootloader and root your HTC U12+ Mobile Phone.
Just a short disclaimer before we reveal the process. We are not responsible for any kind of hardware or software issues that may arise with your device by following the mentioned steps. Although, care has been taken and the guide is properly outlined; it is advisable to refrain from rooting your device if you are unsure about the process and its adverse affects.
Contents
Root HTC U12+ Smart Phone | Prerequisites Before Rooting
Please make sure that, before starting the process, you have taken care of the following prerequisites:
Obligatory Requirements to Root HTC U12+ Without Custom Recovery
- The bootloader of your U12+ must be unlocked. [STEPS GIVEN BELOW]
- You require having the latest ADB & Fastboot files installed on your system.
- The ADB & Fastboot environment must be up and working.
- The battery level of your device must be, at least, 75% or above.
- Please enable the options of USB Debugging from the Developer Options. For activating the ‘Developer Options‘ just navigate to Settings-> About Phone and tap on ‘Build Number‘ about 6-7 times. Then, navigate back to Settings and you will see the option of ‘Developer Options’ coming up.
- Also, the bootloader of your device must be in unlocked state before proceeding with the rooting part.
You can easily root the HTC U11 device easily using this guide. Read More: How to Root and Install Custom Recovery in HTC U11.
Steps to Unlock Bootloader of HTC U12
If the bootloader of your HTC Device is not unlocked then you can follow the below-mentioned steps for doing the same:
- First and foremost, if you haven’t done yet, then please register yourself on the HTC Dev website.
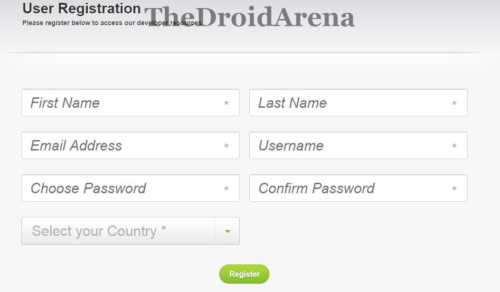
- A link will be sent to your email id, through which you have to verify your registration.
- Once you have done the required verification, please navigate here and click on Unlock Bootloader -> Get Started to begin with the process.

- Please switch off your HTC U12 device and switch it on by pressing Volume Down + Power button together. This will enable your device to enter into bootloader mode.
- Thereafter, on your Windows PC, create a new folder. You can name it anything. Let name it as unlock-u12. Please keep the folder open.
- Please connect your HTC Device to the Windows PC/ Laptop provided that your device has entered into bootloader mode.
- Now navigate to the folder where ADB and Fastboot has been installed on your Windows PC/ Laptop and press the key combination of Shift + Right Click, choosing the option of Open Command Window Here from the subsequent menu that pops up.
Are you a dev who compile Custom ROMS? Then you should know the best ADB and Fastboot commands from here. Read More: Best 15 ADB & Fastboot commands list for Android [Windows/Mac/Linux].
Unlock Bootloader HTC U12 | Get Identifier Token for Bootloader Unlock
- In the command window please type in the following command and hit Enter:
fastboot oem get_identifier_token
- A long text of token will get visible in front of you. Copy it starting from <<Identifier Token Start>> to <<Identifier Token End>>.
- You are required to give this token to HTC. Once HTC gets the token code you will receive an e-mail with Unlock_code.bin attached to the mail.
- Please download the attachment and move it to the unlock-bl folder created above. Now please close the command window and reopen it in the unlock-u12 folder. Once the command window has opened up please key in the following command and execute the same:
fastboot flash unlocktoken Unlock_code.bin
- Once you execute the above provided command a screen will pop-up in front of your device asking for your confirmation to unlock the bootloader. You can use the Volume button to navigate to ‘Yes’ and power button to tap on it.
- That’s it the bootloader unlocking process will start now and your HTC U12 device will automatically restart once the process is over.
If you are looking to root HTC U12+ without having to flash TWRP or any other custom recovery then you are at the right place. Below-provided are the steps which will enable you to gain root access on your HTC U12+ device without resorting to the installation of TWRP or any other kind of custom recovery.
[How-To] Root HTC U12/U12+ Without Custom Recovery [STEPS]
- First of all you require installing the latest Magisk Manger on your HTC device. You can get the latest release from here.
- Thereafter you have to download the img file according to the firmware running on your mobile. You can check for the same from here.
- Generally the naming convention will be img. Once you download the boot.img file you need to copy the same to your HTC U12+ device.
- Once this is done; launch Magisk Manager Application on your mobile and click on ‘Install’ twice. Thereafter select the option of patch boot.img file and a browse window will get opened.
- Through this Browse window please select the img file which you transferred to your mobile device and wait for it to get patched.
- Once this is successful connect your device to the PC with USB Debugging turned on.
- Please navigate to the folder where you have ADB & Fastboot binaries installed and right click anywhere. From the pop-up menu select the option of Open Command Window Here
- Next you require bringing the patches to this Fastboot folder by keying in the following command:
adb pull /sdcard/Magisk Manager/patched_boot.img
- Next please reboot your U12+ into bootloader mode by keying in the following command.
adb reboot bootloader
- Thereafter, you require checking the active slot in the bootloader/download mode on your device.
- Based on your active slot you need to choose one of the following commands to be executed.
Active Slot A: fastboot flash boot_a patched_boot.img
Active Slot B: fastboot flash boot_b patched_boot.img
- Once the flash is successful please use the following command to reboot your device.
fastboot reboot
- That’s it your HTC U12+ will successfully gain root access. Please note that the first reboot might take a little time so don’t get scared. Be patient.
You may like to read the following posts:
- Root & Install Custom Recovery on LG JUDY (LG G7)
- Unlock Bootloader, Install Magisk & Root Razer Phone