
How To Root Bluestacks 3 Latest version [Complete Step by Step 2018 Guide*]
People who all are using Android devices will show their interest always towards downloading and install the applications. We are always keen on downloading the latest apps launched in the market. When it comes to games and applications, Android device will always provide you with the best part of the excellent execution. Apart from using these applications on Android device, most of the people would like to have a more extensive screen experience. In general, working on PC will always provide you with the best screen experience.
Moreover, we could see a lot of people like to show their interest in using Android applications on PC. We all know that it is difficult for the Android users to download and install Android games and app on Windows PC. However, we can find the solution for running the Android applications on your PC without making any difficulties. Yes, it is possible with the help of Android emulator called BlueStacks. By installing BlueStacks on your PC, you can run any Android applications on your PC without any hassles. It is also effortless for the users to access an Android application on their PC further.

If you are looking for BlueStacks/ BlueStacks 2/ BlueStacks 3 to root, then it is easily possible for the user to proceed further. It can happen easily with the one-click process. By just doing a one slick, you can easily root your emulator at any time. By rooting your BlueStacks, the user doesn’t go further for installing additional content. Once the emulator is rooted, you can see a lot of preloaded applications on your PC. By tapping the emulator, you can proceed further to use, and it is easy for the users to use.
Contents
Benefits of rooting your BlueStacks
When it comes to rooting your emulator, it is almost same as your device getting rooted. So, the rooting process is quite easy for the users to do. Moreover, by rooting an emulator, you can find several restricted applications on your BlueStacks. Unlike PlayStore, it will allow the user to find a number of limited apps for free. It is easy for the users to access. Once it is rooted, you can find an unlimited number of applications which are preloaded to your PC.
You can easily install a Custom ROM in your android device with this guide. Read More: How to Install Custom ROM on Android Without PC[Best Guide 2018].
[How to] Download BlueStacks/ BlueStacks 2/ BlueStacks 3
When it comes to downloading an BlueStacks on PC, most of the people aren’t aware of how to download and install further. Hope the given steps will be helpful for the people to install on your PC. Let’s follow the below steps to complete the installation process of an emulator.
Steps to follow
- At first, the users need to visit the official site of BlueStacks [bluestacks.com] to download.
- Make sure to find the respective link and click it to download on your PC.
- Get to know more about the storage memory of your PC and proceed to download.
- Now, the user needs to wait for few minutes until the downloading process is completed.
- When this process is finished, you can now click it to install.
- Finally, the installation process is completed and creates a desktop icon shortcut for a faster launch.
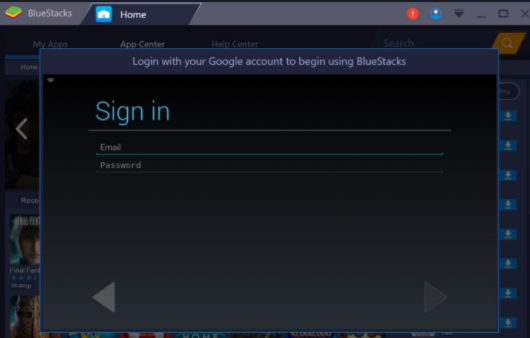
- Now, tap on the emulator icon to open.
- Sign in with your Gmail id which you are using for your Android mobile.
Launch BlueStacks
- At last, you are ready to use an emulator on your PC.
Must Read: [How To] Download and Install ViPER4Android on Android without Root.
These are the steps that you want to follow for downloading and complete the installation process of BlueStacks.
How to root BlueStacks [Steps]
After the installation process of BlueStacks is done, you are now ready to root your emulator to download restricted applications. So, people who all are looking for the process of rooting BlueStacks can follow the below methods. Here we are sharing two ways to check for completing the rooting process.
Method 1: Using Kingoroot
To root BlueStacks, it is essential for you to follow the below steps.
- First of all, it is essential for the user to download and install Kingoroot App in BlueStacks.

Kingroot on BlueStacks
- Once it is installed, you can tap to open kingoroot app and run in an emulator.
- By visiting the rooting application, you can find the option “Root” and click to begin.
- Wait for few seconds until the green check mark display on your screen.
- Now, get set to reboot BlueStacks software.
- To check whether the rooting process is done, make sure to download and install Root Checker.
- Finally, the rooting process on your BlueStacks/ BlueStacks 2/ BlueStacks 3 is done successfully.
Do you want to root your android device without the help of PC? Read More: Root Android Phone Without Computer or PC [ Latest Working Methods ].
Method 2: Using BS helper tool
By using BS helper tool following the given steps, you can root your emulator on PC.
- The user should download BS Helper tool as per the instruction.
- Once it is downloaded, you need to unzip the file to a folder.
- Now, it is essential for the user to double click to run BS helper.
- After the above process is done, the user will see a small kind of application with options to click.
- Now, make sure to tap on “Patch for Superuser X” and wait for seconds.
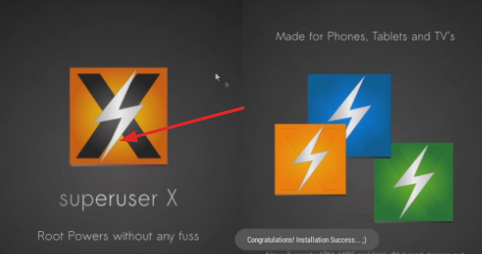
Root BlueStacks with BS Helper
- After the process is completed, you can see the message in the status bar and open on your BlueStacks.
- You can now close the tab and check whether it is rooted or not through root checker.
- Finally, the rooting process for BlueStacks is successfully done and ready to allow Android apps on your Windows PC.
Conclusion: How to Root Bluestacks
An emulator has the potential to provide a number of Android applications for the users to use on Windows PC. By rooting an emulator, you are now ready to get some qualified applications on your PC to use. Here the above two given methods will help you to root BlueStacks.
Read More:
- [How To] Root, Install Custom Recovery (TWRP) and Custom ROM in Essential Phone PH 2.
- [How-To] Root Samsung Galaxy S9 and Samsung Galaxy S9 Plus.
2 thoughts on “How To Root Bluestacks 3 Latest version [Complete Step by Step 2018 Guide*]”